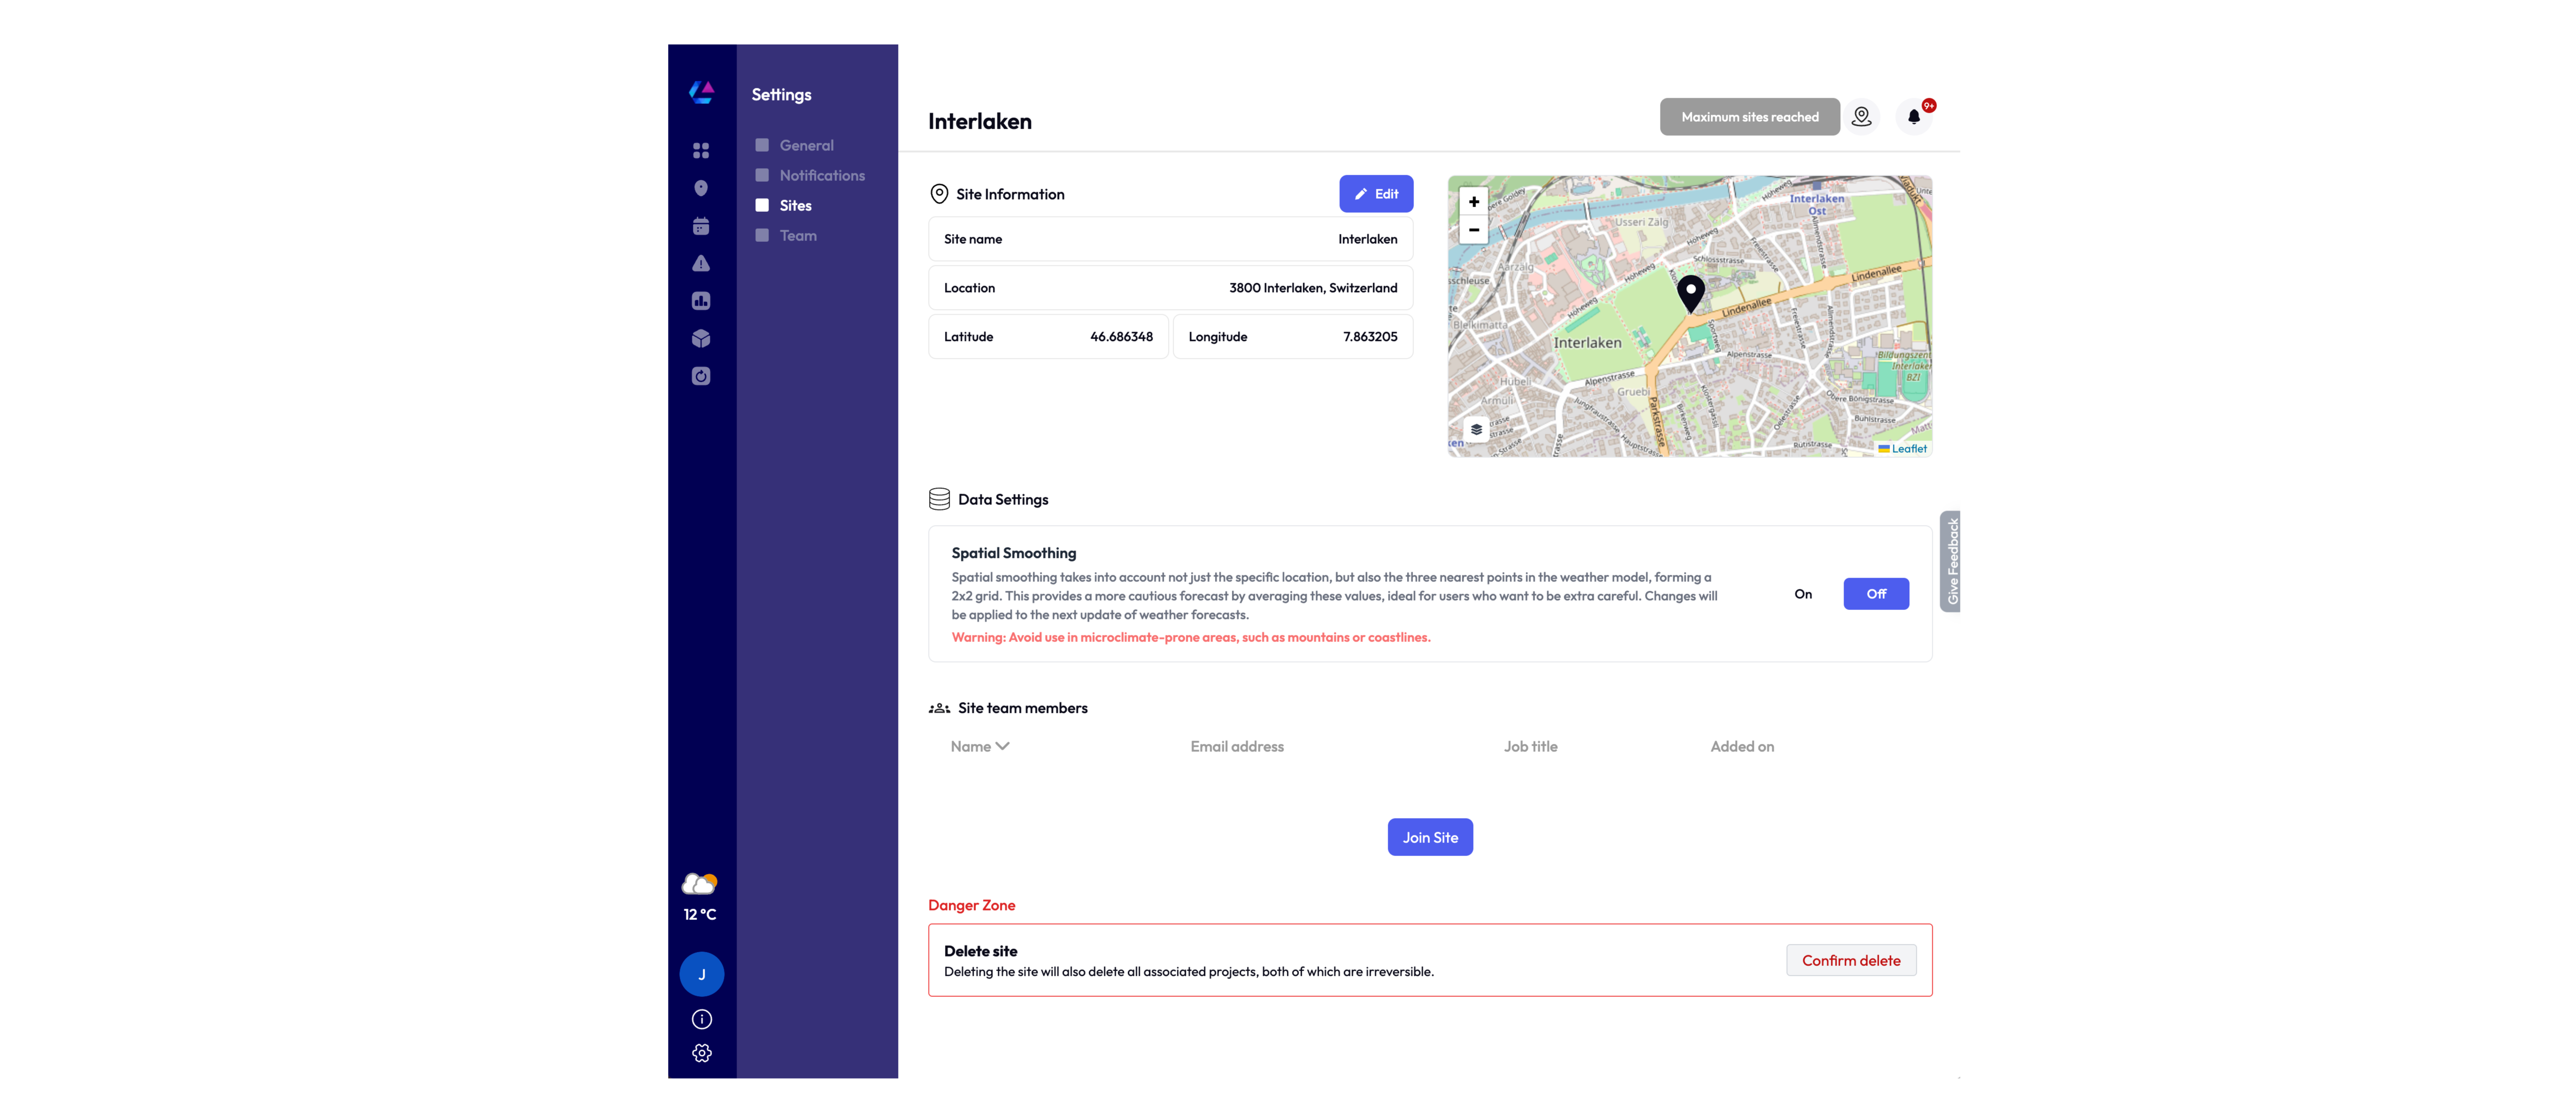
Site Configuration
ClimaLinks allows you to manage one or more sites based on your subscription. Each site corresponds to a unique geographical location (latitude and longitude) and includes specific tasks and assets.
Accessing Site Settings

To add or modify a site:
- Click on the gear icon located at the bottom left of the ClimaLinks interface.
- Select 'Sites' from the submenu.
Site Settings

Managing Your Sites
-
Add a New Site: Click the 'Add Site' button at the top right of the Sites page. Ensure you have sufficient quota for additional sites.
-
Edit Site Details: Modify the name and location of an existing site by searching for the address or interacting with the map to drop a pin or select a region anywhere globally.
-
Enable or Disable Spatial Smoothing:
Spatial smoothing considers not only the specific location but also the three nearest points in the weather model, forming a 2x2 grid. This approach provides a more cautious forecast by averaging these values, ideal for users who prefer extra precision. Changes will be applied during the next weather forecast update.
Warning: Avoid using spatial smoothing in microclimate-prone areas, such as mountains or coastlines.
-
Manage Site Team Members:
Team members are not automatically associated with any given site and must choose to join it. Here, you can view and manage all teammates associated with the current site.
-
Danger Zone: Remove a Site:
At the bottom of the Sites page, you'll find the Danger Zone, where you can permanently remove a site.
Warning: This action is irreversible.
Important Note
Adjusting site location settings can directly impact the analysis and outcomes in ClimaLinks. Ensure that any modifications are made carefully to maintain the accuracy and relevance of your data. You will be prompted to recalculate, which you should do if you want the location changes to take immediate effect.
If you have any questions or need further assistance, please reach out to our support team at support@climalinks.com.